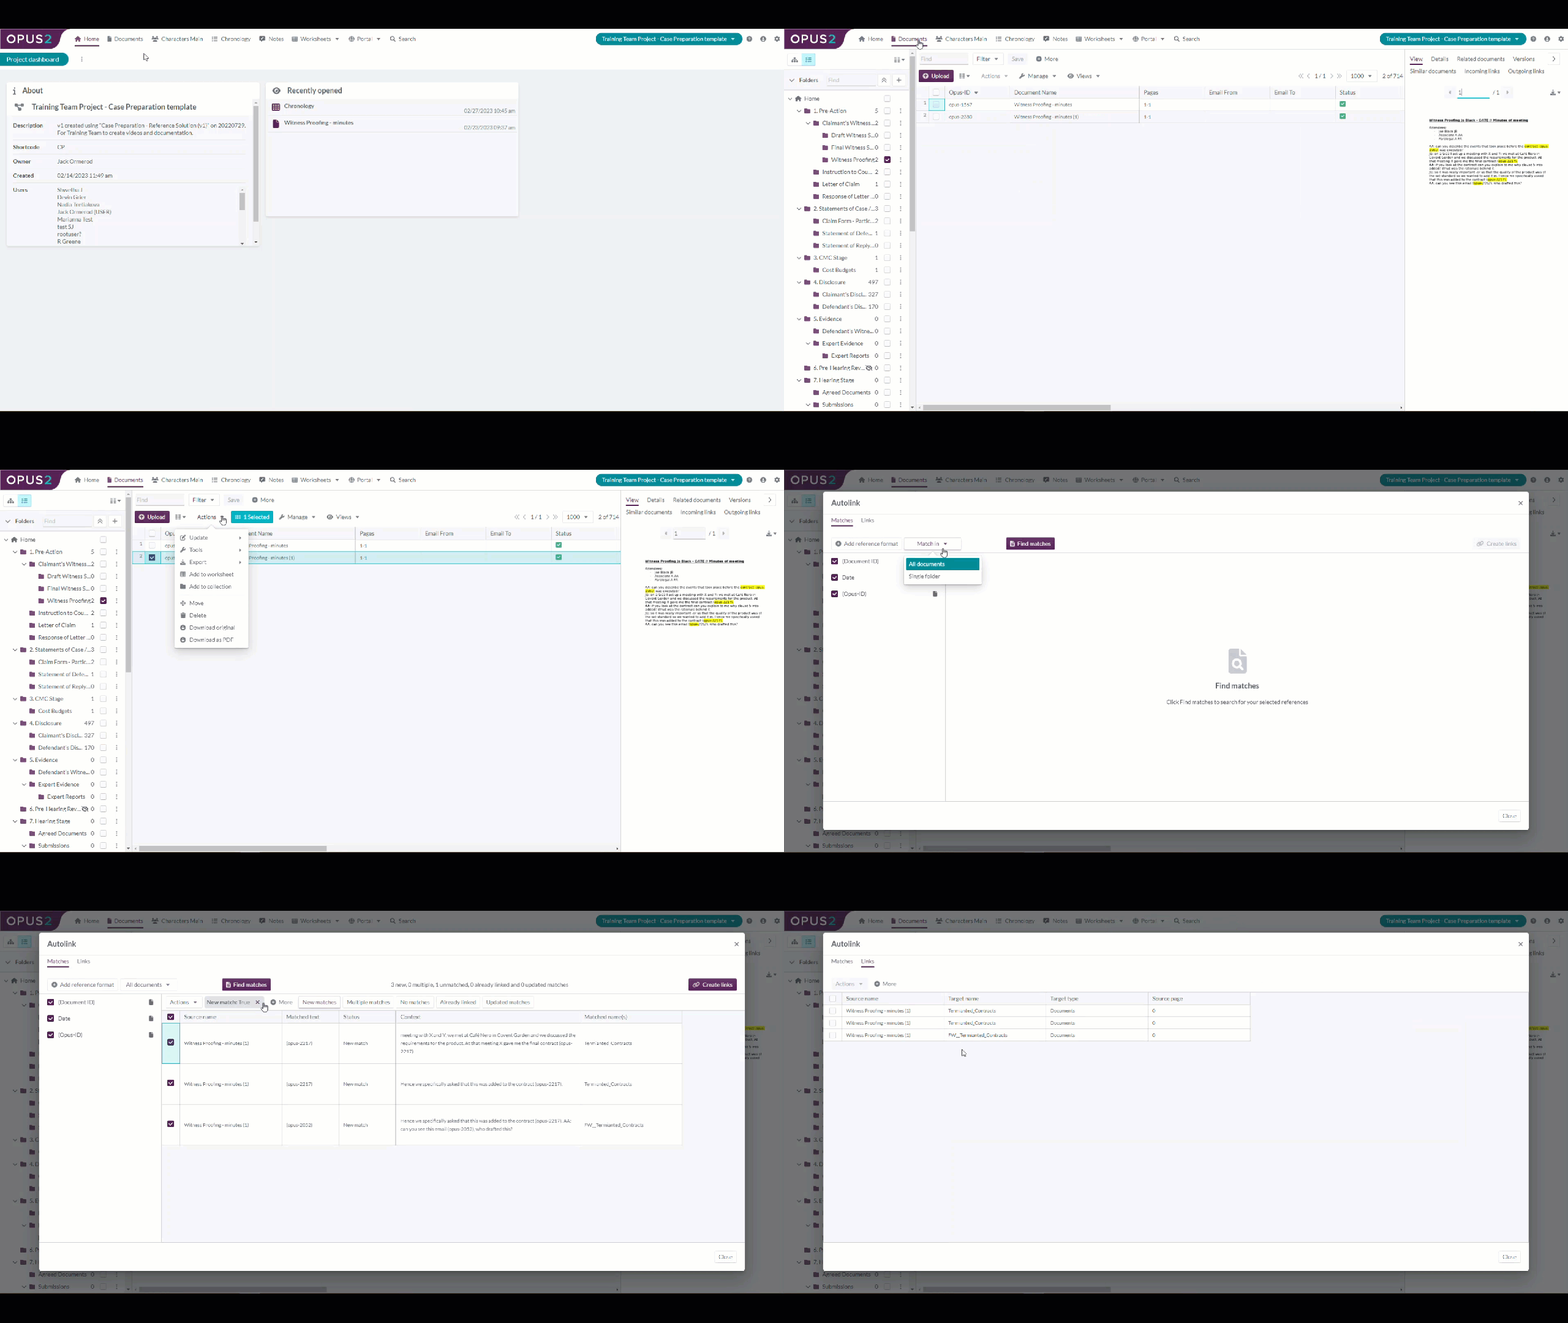
The Opus 2 Autolink tool will find references contained within documents. The system will use the exact parameters that you have defined. For instance; with or without brackets.
Navigate to Documents.
Select the document/s you wish to hyperlink from. The document/s will be ticked.
Click Actions, Tools and then Autolink from the drop-down options, this will open the Autolink dialog.

The reference format setup for your Project will be selected automatically e.g. {Opus-ID}. Add additional reference formats by following the process Here.Reference formats define what the Autolink tool is searching for across the selected document, in order to hyperlink. If the reference to the Document ID metadata field is held within square brackets, this will need to be added as a reference format e.g. [Document ID].
Select the reference format/s that you wish to use to link your documents. These will be ticked.
Click Match in to identify the documents you wish to match against. From the drop-down select:
Click Find matches. The results will be displayed as a table in the main panel.
Select the New matches button and the table will only have New matches visible.

Click Create links.
Hyperlinks can be viewed in three places:
    Within the hyperlinked document - underlining the references.
    Within the Details panel in the Documents tab - after selecting a document, click the Outgoing links tab to see where the document is linking to and click the Incoming links tab to see which document is linking to the selected document.
    Within Details panel in the Events tab - after selecting a source document, click the Outgoing links tab to see where the document is linking to and click the Incoming links tab to see which document is linking to the selected source document.