Complete the following steps:
In your project navigate to Documents.
Find and select the transcript you wish to export.
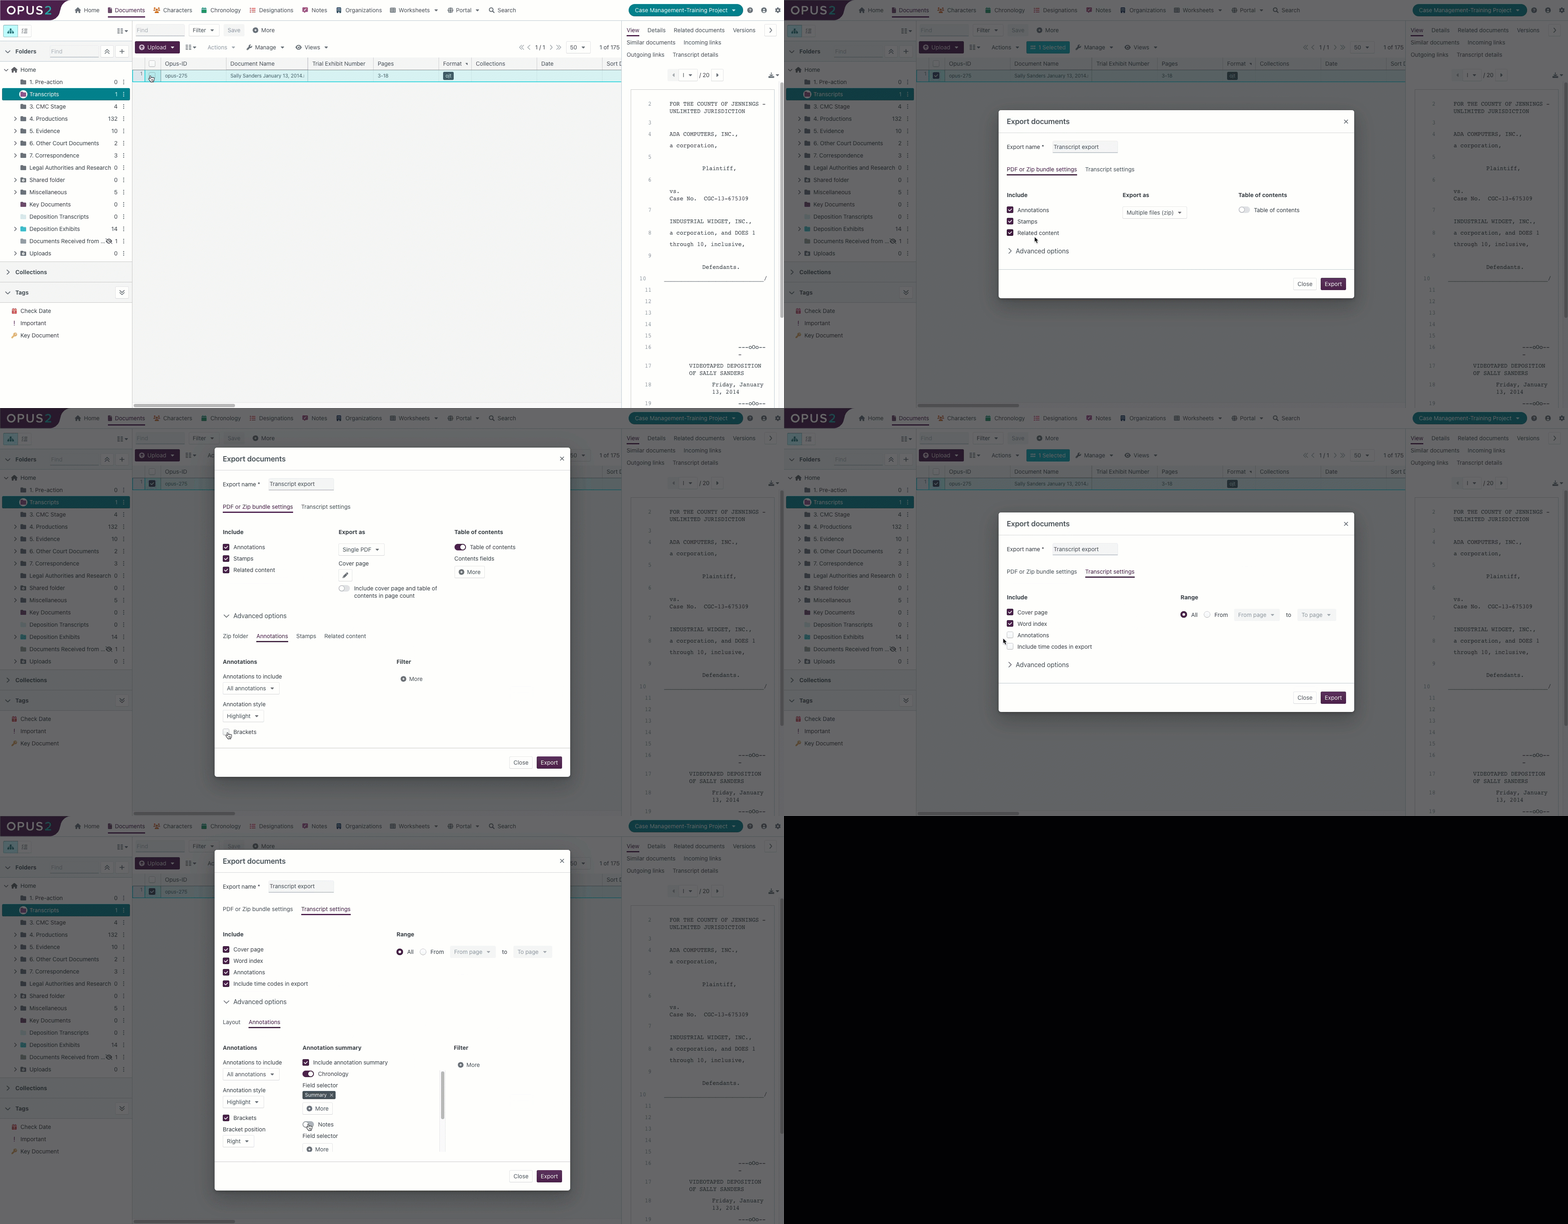
Select Actions, hover over Export and select PDF or Zip bundle. The Export documents dialog opens.
Enter a name for your export.
Under PDF or Zip bundle settings:

In the Include section select all of the options.
Under Export as select Single PDF.
Select Table of contents.
Open the Advanced options and complete the following:
In the Zip folder tab
In the Annotations tab
Select brackets.
In the Stamps tab
Click on Stamps to include and select the stamps you require for your export.
In the Related content tab the Linked content toggle on Include cards for link and set Location to Subfolder.
Under Linked content select Include cards for link.
Under the Transcript settings:
In the Include tab
Select Annotations.
Select Include time codes in export.
Open Advanced options:
Under Annotations
Select brackets.
Under Annotation summary, , toggle on the type of annotations you want to see and open the individual Field selector and choose up to 8 fields in each.
Select the Include annotation summary.
Select all of the annotation types you want to export.
From the More button select a field you wish to be displayed on your summary. You can add up to 8 fields from your worksheet. The fields will be displayed in the order you have entered them.
Click on Export to complete the process.
Click on the Project button and select Exports.

When the export process has completed the
 button will be available. Clicking this will download the export to your computer.