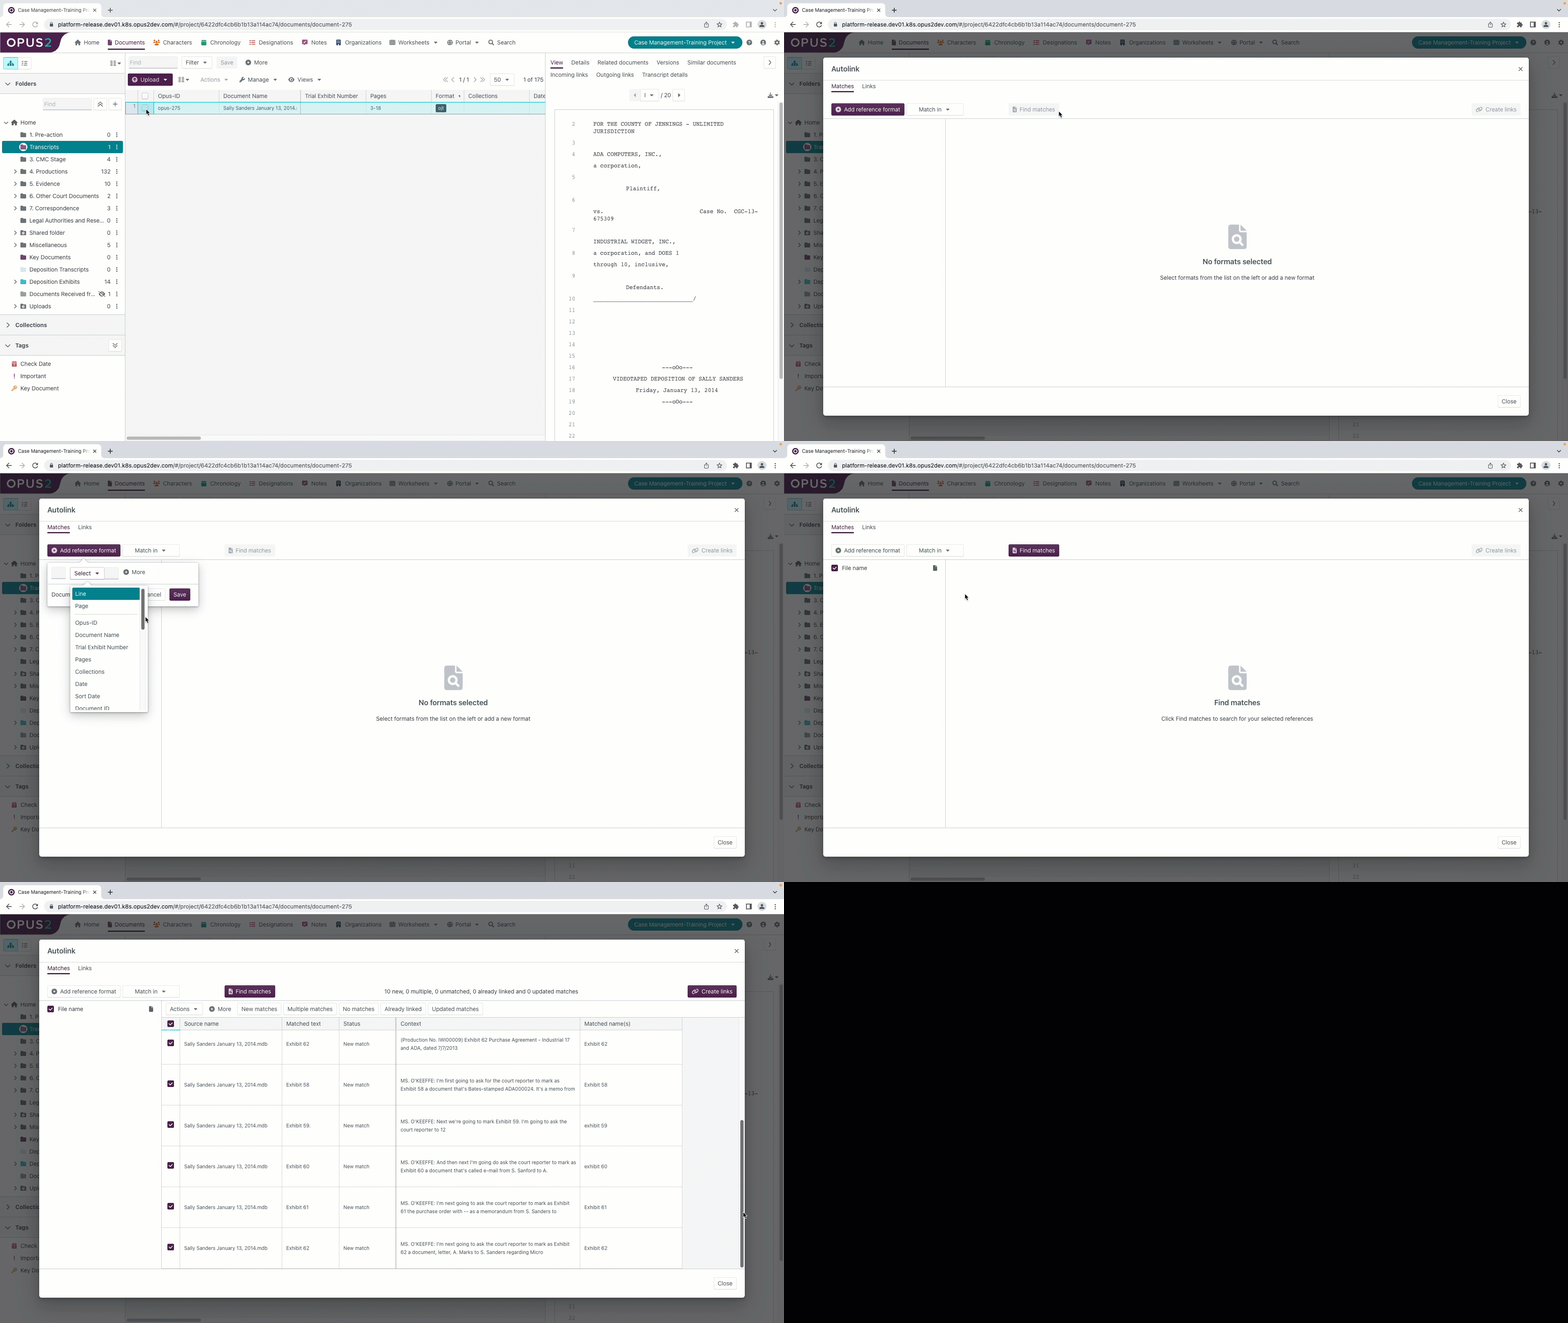
Complete the following steps:
In your project navigate to Documents.
Find and select the Transcript you wish to link from.
Choose Actions, Tools and select Autolink.
The Autolink dialog opens.

In the left-hand column ensure only Exhibit format is ticked. Ensuring your exhibit files are named exactly as they are mentioned in the transcript, i.e. "Exhibit 1" will allow you to utilize the document or file name field for linking.
If the text in the Matched Text box does not have an exact match anywhere in the transcript (e.g. the exhibit is named "Exhibit 1.pdf" and is referenced in the transcript text as "Smith 1"), users can update the Depo Ex No metadata field with correct text and match on that field.In the toolbar click on Match in and select Single folder.
Click on the icon and the Select folder dialog opens.
From the list select the folder where your Exhibits are stored.
Click on Select to complete the process.
Select Find matches and a table will open with results of the linking process.
Using the buttons above the table, choose one at a time and complete the following:
New matches – Ensure all rows are selected.
Multiple matches – Ensure all rows are selected.
No matches – Deselect the rows.
Already linked – Deselect the rows.
Updated matches – Ensure all rows are selected.
Select Create links to complete the process.